Work on the UNSW Sunswift II and III Solar Cars.
Perhaps the best engineering experience I have thus far had was the year I spent abroad in Australia working far too hard on the University of New South Wales Sunswift II and Sunswift III solar cars. I went abroad primarily for this reason. U of I had canceled their solar car project in 2000, the year that I ended up getting into the school, and I always wanted to work on a solar car. This was a project that involved a lot of people doing all sorts of different jobs, putting in long hours because the people were fun and the project interesting. While on this team, I helped solder solar arrays, troubleshoot and assemble maximum power point trackers, do carbon fiber layup, research and write mold release procedures, call up people to raise money, answer questions at trade shows, and other tasks. Oddly enough, at one point I found the U of I's Photon Torpedo in the dumpster, minus all the important bits. Somewhere there are some photos of me driving around with this thing tied onto the back of my pickup truck, but I don't know where they are.
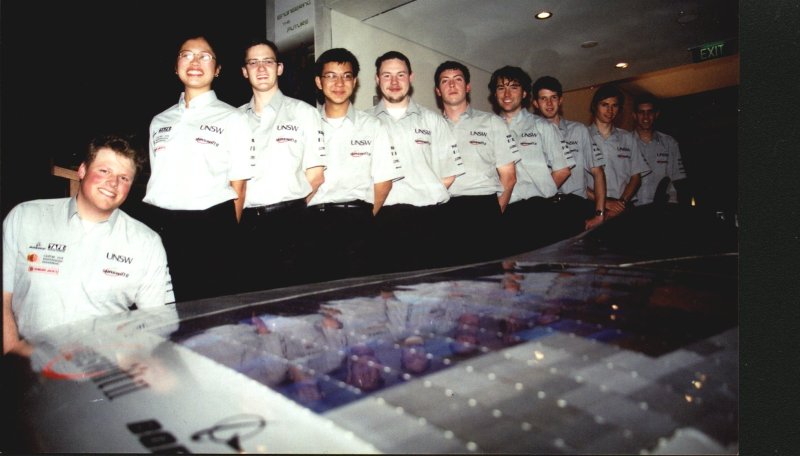 This is is a photo of the Race Team for World Solar Challenge 2003. There were
many other people on the team than this; We just lucked out to be the ones who
got to go on the race. From left to right, me, Lauren, Rob, Owen, Pavel, Andrew,
Dave, Bonne, Blenno, and Ryan. We are standing over the actual Sunswift II at
the launch party. I am in the front of the picture because I did not wear the
right style of pants. Everyone else was wearing black slacks, and I show up in
jeans. Oops. The very friendly and nice photographer suggested I kneel, and
so it is forever recorded in this picture.
This is is a photo of the Race Team for World Solar Challenge 2003. There were
many other people on the team than this; We just lucked out to be the ones who
got to go on the race. From left to right, me, Lauren, Rob, Owen, Pavel, Andrew,
Dave, Bonne, Blenno, and Ryan. We are standing over the actual Sunswift II at
the launch party. I am in the front of the picture because I did not wear the
right style of pants. Everyone else was wearing black slacks, and I show up in
jeans. Oops. The very friendly and nice photographer suggested I kneel, and
so it is forever recorded in this picture.
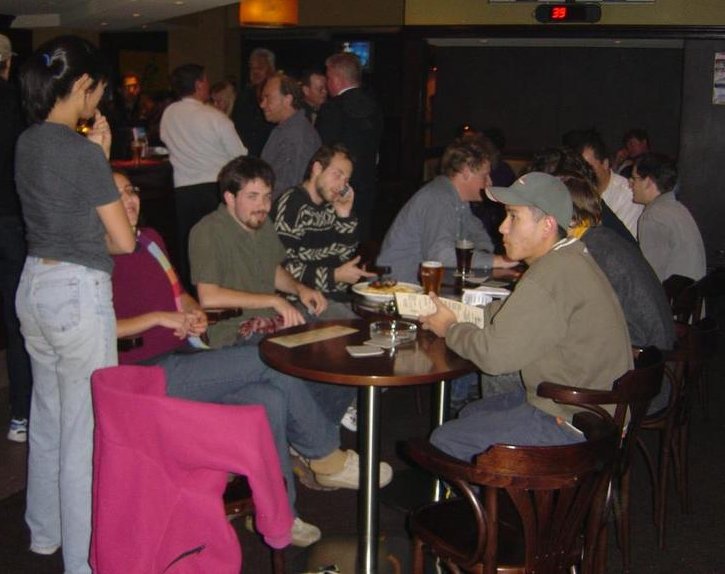 One of the most important things about design teams, that I have missed in
recent projects after this, is the going out to get sloshed end of it. Every week,
following the team meeting, we would all rock up to The Reg and order potato wedges and beers
(Fosters is NOT Australian for beer), and talk about issues. Many important design decisions
with regard the solar cars were made at the bar. It is very nice to work long hours
with people if there is also a sitting around and drinking aspect. Work still
gets done, just in a different environment than the shop. A lot of people seem to
underestimate the importance of getting out of the shop and relaxing a bit.
One of the most important things about design teams, that I have missed in
recent projects after this, is the going out to get sloshed end of it. Every week,
following the team meeting, we would all rock up to The Reg and order potato wedges and beers
(Fosters is NOT Australian for beer), and talk about issues. Many important design decisions
with regard the solar cars were made at the bar. It is very nice to work long hours
with people if there is also a sitting around and drinking aspect. Work still
gets done, just in a different environment than the shop. A lot of people seem to
underestimate the importance of getting out of the shop and relaxing a bit.
 The battery problem, one of many problems that we worked through. We had new packs
made for the race, and used them as little as possible during testing to make sure
we did not wear them out. Unfortunately, we noticed them draining faster than they
should have while we were doing the final testing. It turns out that they were assembled
with the wrong kind of tabbing. This means that the battery internal connections were
getting hotter than they should, which did not register on any of our telemetry
equipment. We spent the night before we left ripping the tabbing off, and then
driving around like crazy getting new tabbing put on the next day. The folks at the
battery shop were very helpful to use in this regard.
The battery problem, one of many problems that we worked through. We had new packs
made for the race, and used them as little as possible during testing to make sure
we did not wear them out. Unfortunately, we noticed them draining faster than they
should have while we were doing the final testing. It turns out that they were assembled
with the wrong kind of tabbing. This means that the battery internal connections were
getting hotter than they should, which did not register on any of our telemetry
equipment. We spent the night before we left ripping the tabbing off, and then
driving around like crazy getting new tabbing put on the next day. The folks at the
battery shop were very helpful to use in this regard.
 At one point, I was the Mechanical Team Leader, and as part of this, I was
doing research on making the tooling for the parts of the solar car. This was an
experiment in making a cast positive from an existing tooling mold. This tool was
never used, but the knowledge gained from this mess was instrumental in understanding
gel coats and tool making. Eventually I produced a mold release handbook, that
includes the steps to make the tooling negatives, and the treatment of these tools
to make them stable and suitable for carbon fiber work in the Boeing/Hawker De Haviland autoclaves.
At one point, I was the Mechanical Team Leader, and as part of this, I was
doing research on making the tooling for the parts of the solar car. This was an
experiment in making a cast positive from an existing tooling mold. This tool was
never used, but the knowledge gained from this mess was instrumental in understanding
gel coats and tool making. Eventually I produced a mold release handbook, that
includes the steps to make the tooling negatives, and the treatment of these tools
to make them stable and suitable for carbon fiber work in the Boeing/Hawker De Haviland autoclaves.
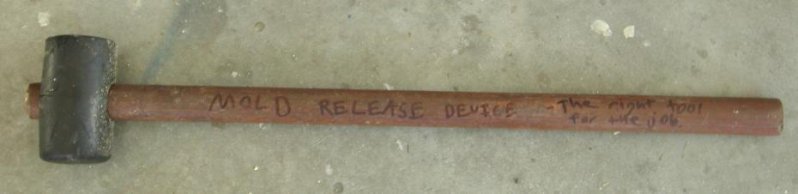
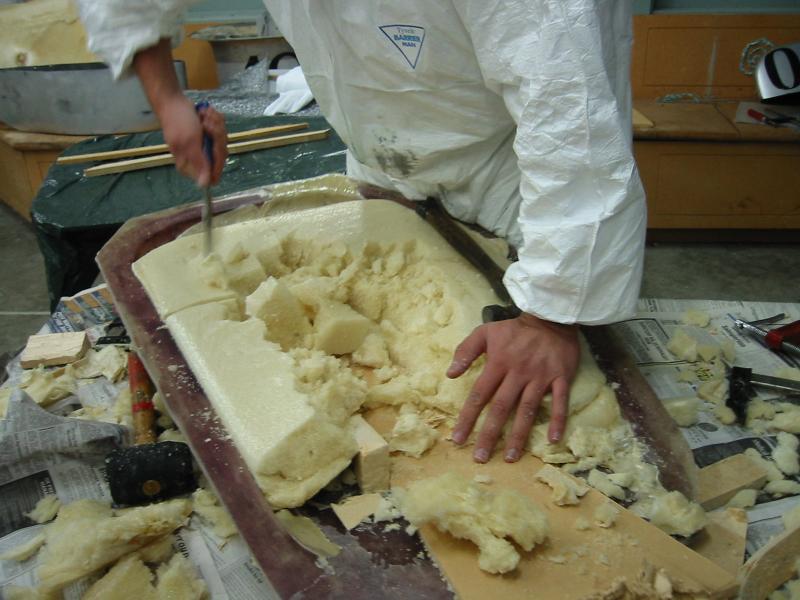 We also had a lot of mistakes happen while doing work on the tooling. We were working with
making expanding foam tools as a way to make plugs from other parts. Tool making involves
starting with a plug, made in our case by CNC machining. A mold is then made from this plug
that will stand up to the rigors of carbon fiber work and handling. Making molds involves
putting down a release agent on the plug, then a gel coat, then building up progressive
layers of material. Finally, a filler or very coarse material is used to make a structural
back, to make the mold flex as little as possible when it is handled and used. This particular
photo shows us experimenting with release agents (in our case Zyvax, which is really awesome
water based stuff) and expanding foam. Someone had sanded the tool without letting us know,
and we went and poured expanding foam in. When the process works, the mold pops off the plug
with a simple wack from the big hammer shown at the top of the page. The results of this
experimentation were used in making the tooling for Sunswift III.
We also had a lot of mistakes happen while doing work on the tooling. We were working with
making expanding foam tools as a way to make plugs from other parts. Tool making involves
starting with a plug, made in our case by CNC machining. A mold is then made from this plug
that will stand up to the rigors of carbon fiber work and handling. Making molds involves
putting down a release agent on the plug, then a gel coat, then building up progressive
layers of material. Finally, a filler or very coarse material is used to make a structural
back, to make the mold flex as little as possible when it is handled and used. This particular
photo shows us experimenting with release agents (in our case Zyvax, which is really awesome
water based stuff) and expanding foam. Someone had sanded the tool without letting us know,
and we went and poured expanding foam in. When the process works, the mold pops off the plug
with a simple wack from the big hammer shown at the top of the page. The results of this
experimentation were used in making the tooling for Sunswift III.
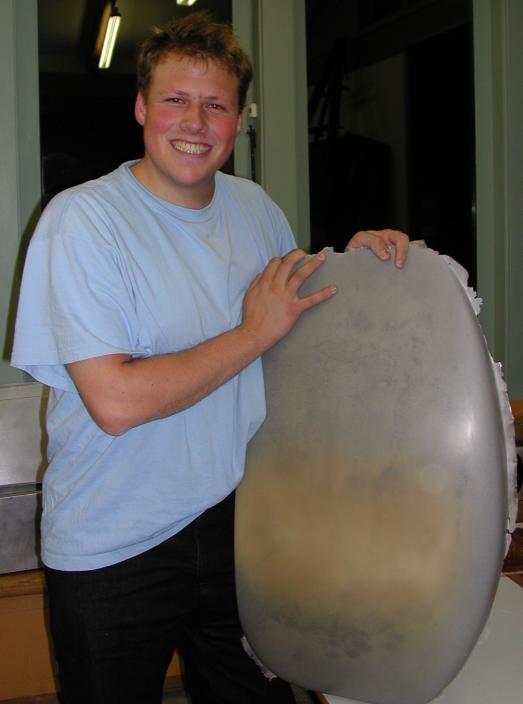
 Another extremely annoying part of doing tooling is getting a quality gel coat.
The gel coat is what ends up being the tooling surface that eventually ends up
being the outside surface of your finished part. The gel coat needs to be entirely
free of air bubbles, cracks, and surface imperfections. Any surface issues in the
gel coat will get into the finished part, which could create problems from release
issues to structural problems to mere blemishes. In this picture, Scott is removing
a botched gel coat from one of our plugs. The function of the Zyvax is seen here.
The gel coat is easily cracking off the surface, which shows the release agent
actually worked.
Another extremely annoying part of doing tooling is getting a quality gel coat.
The gel coat is what ends up being the tooling surface that eventually ends up
being the outside surface of your finished part. The gel coat needs to be entirely
free of air bubbles, cracks, and surface imperfections. Any surface issues in the
gel coat will get into the finished part, which could create problems from release
issues to structural problems to mere blemishes. In this picture, Scott is removing
a botched gel coat from one of our plugs. The function of the Zyvax is seen here.
The gel coat is easily cracking off the surface, which shows the release agent
actually worked.
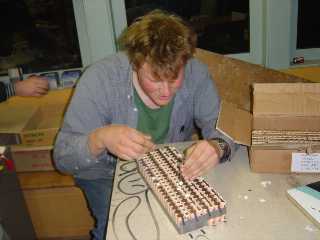
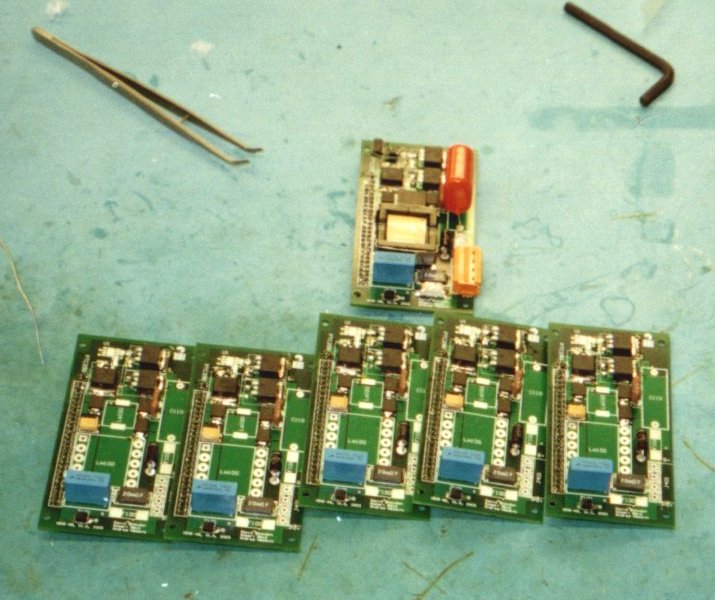 I volunteered to assemble a whole slew of maximum power point tracker boards,
my first SMT assembly gig. This was a design project done by Rob. All I did was put
together a bunch of these, and lent a small amount of help in debugging them.
It turns out that there was a communications mistake with these boards, and
the schematics that were used to lay out the PCB's were not up to date with
the debugging copies that Rob was working with, which meant all the boards were wrong.
These devices eventually were made functional, but not in time to be used in Sunswift II.
I volunteered to assemble a whole slew of maximum power point tracker boards,
my first SMT assembly gig. This was a design project done by Rob. All I did was put
together a bunch of these, and lent a small amount of help in debugging them.
It turns out that there was a communications mistake with these boards, and
the schematics that were used to lay out the PCB's were not up to date with
the debugging copies that Rob was working with, which meant all the boards were wrong.
These devices eventually were made functional, but not in time to be used in Sunswift II.
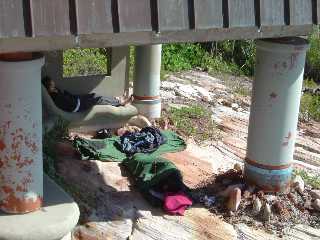 In the time immediately before we left for the WSC '03, the race team slept out at
Solarch. This was to get used to roughing it, bond as a team, and be available to
be extra hard-core to get stuff done on time. Solarch was once a grand and
awesome example of sustainable architecture, complete with a big PV array,
lots of windows, passive heating/cooling, and environmentally friendly materials.
Unfortunately, some design issues were overlooked, and I believe UNSW would
rather forget about Solarch. That being said, it made a great place to work on
the Solar Car, even if it was broken into every few weeks. Blenno and I rocked up
under this little conference room at the back of Solarch with the swags.
Just a few hundred feet away was a beach, so not a bad place to camp out at all.
In the time immediately before we left for the WSC '03, the race team slept out at
Solarch. This was to get used to roughing it, bond as a team, and be available to
be extra hard-core to get stuff done on time. Solarch was once a grand and
awesome example of sustainable architecture, complete with a big PV array,
lots of windows, passive heating/cooling, and environmentally friendly materials.
Unfortunately, some design issues were overlooked, and I believe UNSW would
rather forget about Solarch. That being said, it made a great place to work on
the Solar Car, even if it was broken into every few weeks. Blenno and I rocked up
under this little conference room at the back of Solarch with the swags.
Just a few hundred feet away was a beach, so not a bad place to camp out at all.
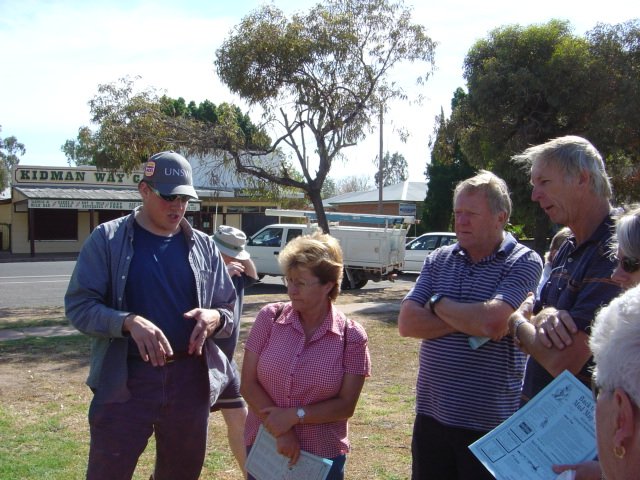 One of the other things I really enjoyed doing is explaining stuff to people.
On the way to the start of WSC, we stopped at towns along the way, set up in parks,
rolled out the car, and stood around to field questions and talk about how neat
solar energy is. We also managed space at CeBIT Australia, NRMA apppearances, and others.
I heard a lot of people ask a lot of very good questions. In retrospect, these
opportunities were among the more valuable parts of this experience,
given my current recurring interest in solar power.
One of the other things I really enjoyed doing is explaining stuff to people.
On the way to the start of WSC, we stopped at towns along the way, set up in parks,
rolled out the car, and stood around to field questions and talk about how neat
solar energy is. We also managed space at CeBIT Australia, NRMA apppearances, and others.
I heard a lot of people ask a lot of very good questions. In retrospect, these
opportunities were among the more valuable parts of this experience,
given my current recurring interest in solar power.
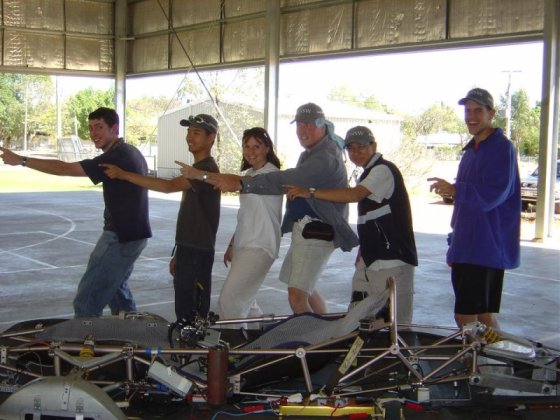 Whenever I have my camera and a group of people, I feel compelled to have everyone
point in a picture. This particular photo was at a school in Longreach during one
of our Q and A stops. This is what the Sunswift II chassis looks like without the
array mounted. The Sunswift III is a monocoque design, which means it gets
all its strength from carbon fiber structural elements, rather than
Sunswift II's welded metal frame.
Whenever I have my camera and a group of people, I feel compelled to have everyone
point in a picture. This particular photo was at a school in Longreach during one
of our Q and A stops. This is what the Sunswift II chassis looks like without the
array mounted. The Sunswift III is a monocoque design, which means it gets
all its strength from carbon fiber structural elements, rather than
Sunswift II's welded metal frame.
 Unfortunately, we never made it to WSC. There was an accident that killed our
poor Sunswift II. This photo was taken in lovely Winton. Sunswift II is
right behind the person taking the picture. It was kind of a sad day, with
certain team members taking it harder than others. Some members went on to WSC
and helped out other teams on their own accord. Some of us flew back to UNSW,
and the rest of us drove the remaining undamaged cars back to UNSW. After some
time of mourning, the team went right back into designing the UNSW Sunswift III.
Unfortunately, we never made it to WSC. There was an accident that killed our
poor Sunswift II. This photo was taken in lovely Winton. Sunswift II is
right behind the person taking the picture. It was kind of a sad day, with
certain team members taking it harder than others. Some members went on to WSC
and helped out other teams on their own accord. Some of us flew back to UNSW,
and the rest of us drove the remaining undamaged cars back to UNSW. After some
time of mourning, the team went right back into designing the UNSW Sunswift III.

