Panel Construction: When you need a couple of control cabinets right now
On a contract job I was tasked with designing and programing some PLC equipment that was to be used in an industrial facility. This turned into a Rush Job, and my client could find no panel shop willing to turn the order around in two weeks for a price they were willing to pay. So, I fired up the tools in the Linder Engineering Works Denver Headquarters and started building. I am not a panel shop, but I certainly know enough about wiring and layout to make panels that were able to meet the requirements and pass the inspections required by my client.
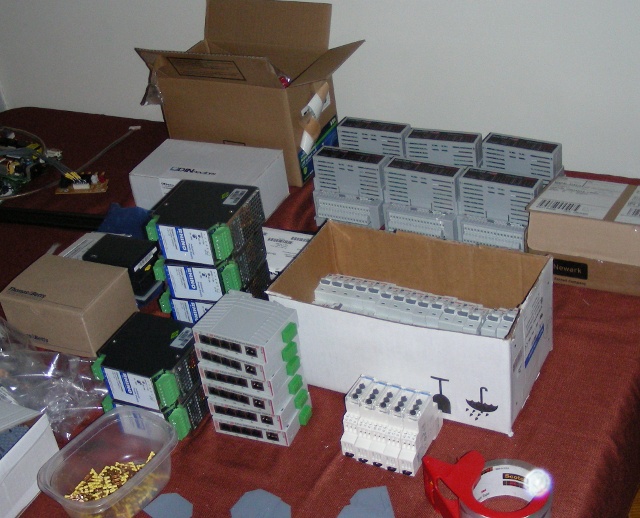 This was a design for a third party, which was expecting a panel shop to manufacture the equipment. This meant that my design documentation included a full BOM (Bill of Materials) and manufacturing drawings. So, the design in hand, the next step is to start ordering parts. This photo shows the stack of components ordered for this job, including PLCs, power supplies, and terminal blocks.
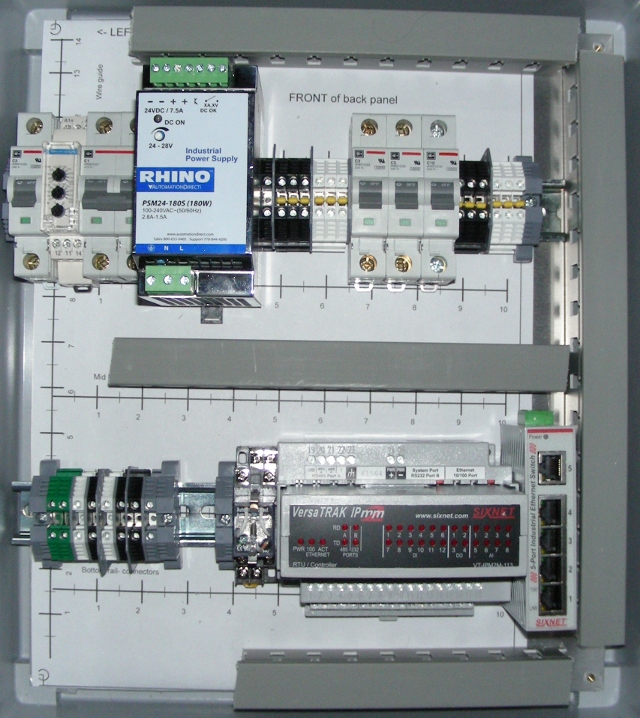 My shop drawings include a little layout helper that is used to align components mounted on the backpan for the prototype unit, and can then serve as a drill template for the subsequent units. This works out quite nicely for small panels like this that need to be built in a hurry. It shows fractional inches, and then underneath, the footprints for the devices and the hole centers for mounting. This was used to drill holes in the backpan for the DIN rail, and verify that everything fits properly. This cabinet inlucdes a PLC, some AC sense equipment, a relay, an Ethernet switch, a PLC, and then breakers and cables.
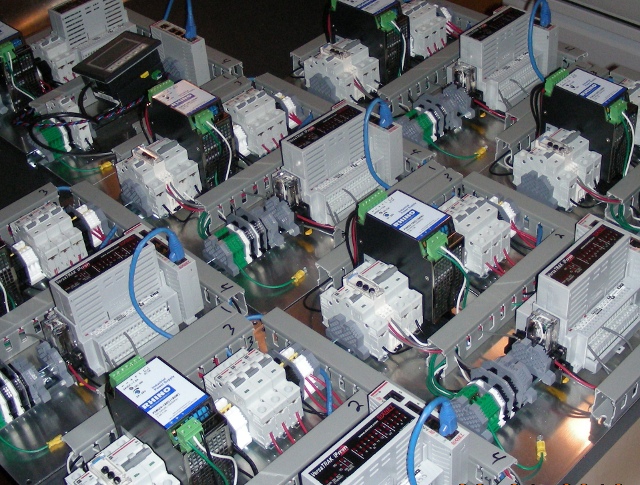
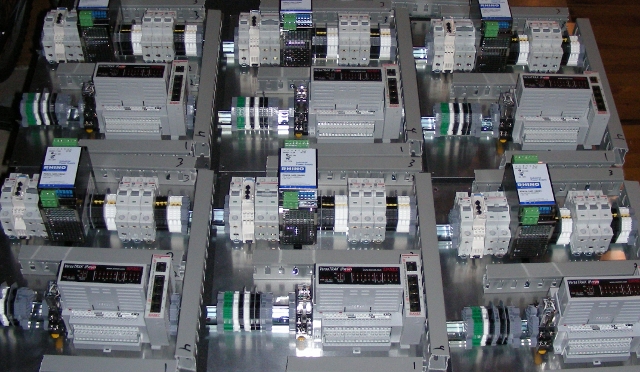 Having completed the original prototype layout and drilled the backpans, next up is volume assembly. This photo shows six of the panel backplans complete. Because my shop is small, basically in my living room, I chose to separate assembly and wiring to optimize tool selection and work space. The total order was for six of one type of panel and one of another. Panel assembly like this goes quite quickly once the backpans are drilled.
 Once they were assembled, they moved into the wiring department. By that, I mean I put away the drills and put wire spools on my wire rack, and started wiring. Doing a total of seven of these is among the larger projects I would be willing to do in my apartment, which is why we had a hard time finding a panel shop to do it. All together, this took me a few 8-hour days to assemble all of them myself, which is too small a job for many panel shops to want to bid, or at least, so claimed my client at the time. This unit sensing AC voltage coming in through terminal blocks at the left bottom, and outputs a control signal via a relay to the left of the PLC. The Ethernet switch connects the PLC to a central Server, the contents of which was outside my scope of work.
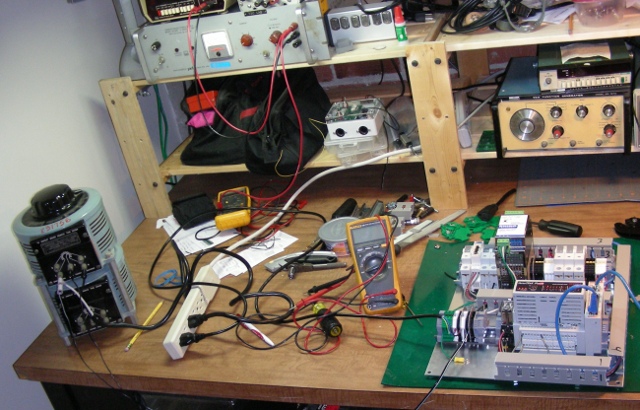 Testing. I do not live in a UL Panel shop, but I am a thorough person, even when doing things under time pressure. Each panel was programmed and tested on the bench. To the left is my two-phase AC Variac, another piece of useful equipment removed from a school's dumpster and repaired. One of the phases was wired into the AC input to set and test the panel's AC trip points and verify relay outputs. The panel was connected into the Laptop to verify the programming inputs and outputs being present at the assigned IP address and Modbus indices.
 Wired, tested, and ready to ship out the door. After verifying the assembly and testing notes with my client, and making a couple of changes, I applied the basic fixes requested to these units. My client never saw these panels in person until they were installed at the job site. The testing and redline procedures happened via email and by sending photos and configuration files back and forth. As projects grow larger, more people need to be involved, but this can result in growing inefficiencies. The client paying for this work had one point of contact with me, which meant that we could get things fixed immediately, with very low email overhead. The whole assembly and testing/programming job took only a few days.
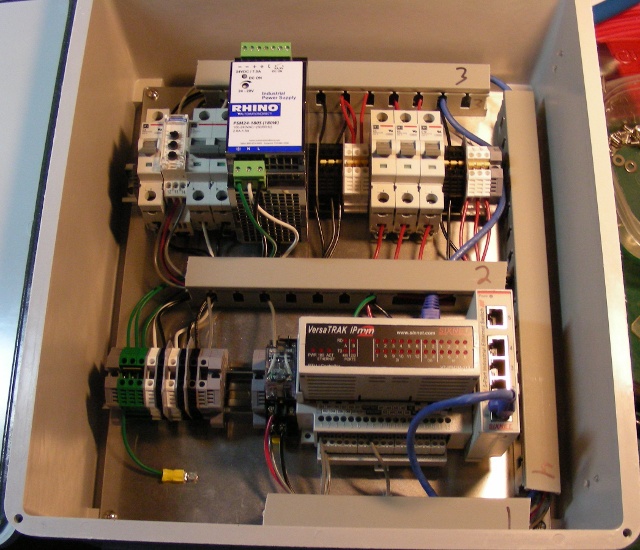 The last step is final assembly into the box. Each box got a copy of its prints tucked into the inside, along with a one-page installation drawing that I did up based on conversations with client, and the overall system drawings. The electricians at the job site needed to terminate wires to the terminal blocks at the lower left. These blocks are not labeled, which generally is a Big No-No to me, but the panel is simple enough, and a full layout drawing is laminated and attached to the front lid of the panel, which is an acceptable compromise on a small panel like this.
 The Shipping and Receiving department shipping the panels out. I learned a long time ago to save the boxes that NEMA plastic boxes come in, as you can use them again to ship back out. These panels were installed in the customer's facility, and then my colleague and I flew out to do commissioning and testing. This work involved testing the communications from the panels back to the central server, and verifying that the panels output responding to manually forced inputs via the Ethernet communications channel. The central server that orchestrated the work was in the scope of another vendor, so having demonstrated that our panels responded to commands from and issued the proper data to the server, our contract was complete.

